A media center should fit the room, not merely fill it. Accurate measurements help determine the ideal screen size, cabinet width, speaker placement, and viewing distance. They also reveal practical limits, such as door swings, window positions, electrical outlets, and heating vents. Small details matter.
The question is simple: How to measure a room for a new media center? Begin with a reliable tape measure, a notepad, and a level floor plan. Record the room’s length and width at several points. Older homes may have uneven walls, so one measurement can be misleading. Measure ceiling height, too, especially when planning tall storage or mounted equipment.
Leave clear walking space around the furniture. A television that fits one wall may still look crowded beside a doorway. Note the distance from the primary seating position to the screen. This helps guide screen selection and reduces uncomfortable viewing. Mark outlet locations and estimate cable paths before choosing a console. Keep ventilation space around receivers, game systems, and amplifiers.
Measure twice.
Professional installers often confirm dimensions on-site because furniture specifications can vary slightly. I have found that paper plans sometimes ignore baseboards, trim, or floor-level obstructions. That oversight can create costly adjustments later. A careful measurement process is not complicated, but it requires patience and honest review. If the layout feels tight on paper, it will probably feel tighter in daily use. This guide explains the measurements that support a balanced, functional, and dependable media center.
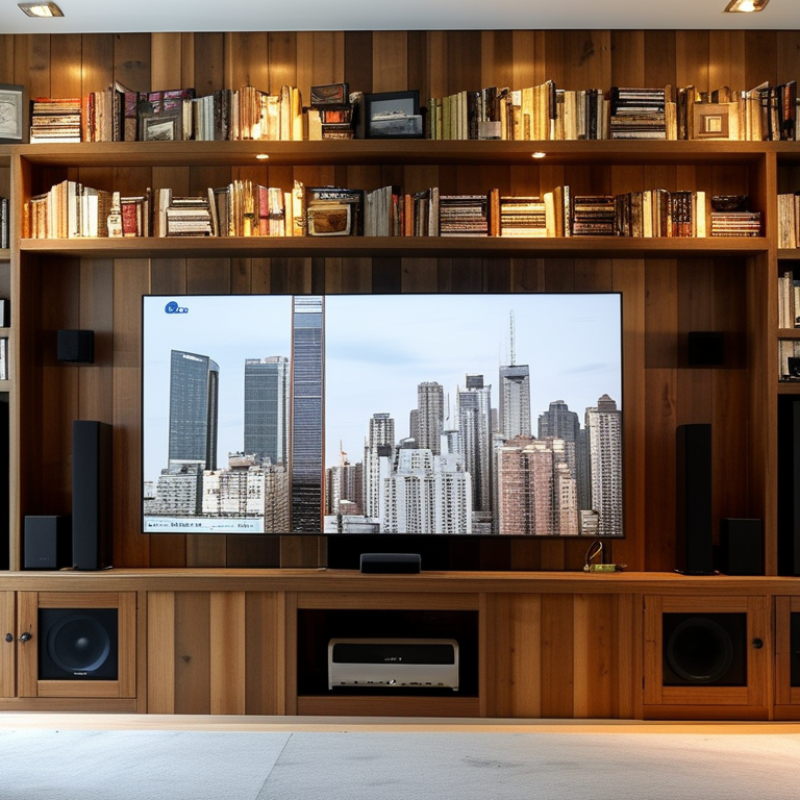
The best way to measure a room for a media center is to document its usable room envelope. Measure the wall width, ceiling height, and available depth, recording every dimension to ±1/8 inch. Use a rigid tape measure and write measurements immediately. Do not rely on memory.
Measure from finished surface to finished surface, not from framing or unfinished edges. Check the width near the floor, center, and ceiling because walls may taper slightly. Record baseboards, door casings, vents, outlets, windows, and radiators. Note how far each feature projects into the room. Measure the intended media center location at several points. A small obstruction can change the design.
Tips: Create a simple sketch with labels. Mark outlet locations and cable paths. Measure diagonal distances when delivery access is tight. Check stairways, hallways, and door openings too. I once measured the wall perfectly but missed a thick baseboard. That error reduced the practical depth by nearly an inch. Measure twice. A second person can hold the tape steady, although even careful measurements deserve a final review before ordering or building. Leave a small clearance for ventilation and installation, rather than forcing the unit against an uneven wall.
What Is the Best Way to Measure a Room for a Media Center?
Set the 16:9 Screen Plan Using SMPTE’s 30° Viewing Angle
Measure from the viewer’s eye position to the screen plane, not the rear wall. This distance controls the correct screen size. SMPTE Engineering Guideline EG-18-1994 recommends a horizontal viewing angle near 30 degrees for comfortable, detailed viewing. For a 16:9 screen, multiply viewing distance by 0.536 to estimate screen width. At 10 feet, the width becomes about 5.36 feet, producing a diagonal near 74 inches. Small errors matter.
ITU-R BT.2020-2 identifies 16:9 as the standard UHD image aspect ratio. Keep that ratio fixed before choosing cabinet dimensions. Measure the wall width, ceiling height, seating depth, and furniture projection. Leave space around the screen for ventilation and cable routing. A screen that fits the wall may still feel oversized from the nearest chair. I have seen this happen.
Use the farthest and nearest seating positions as separate checks. The 30-degree target should serve the main seat, not every chair. Mark the screen corners with painter’s tape before installation. Sit down, look forward, and check whether your eyes land near the upper third of the image. SMPTE guidance supports this viewing geometry, but real rooms remain imperfect. Reflections, low ceilings, and reclined seating can change the result. Measure twice. Adjust once.
Use the primary seating eye position as the reference point. The table below converts viewing distance into a 16:9 screen plan based on a 30° horizontal viewing angle.
| Viewing Distance | Recommended Screen Width | Recommended Screen Height | Calculated Screen Diagonal | Approximate Screen Area | Planning Interpretation |
|---|---|---|---|---|---|
| 6 ft / 1.83 m | 3.22 ft / 0.98 m | 1.81 ft / 0.55 m | 44.2 in / 112 cm | 5.83 sq ft / 0.54 m² | Compact room or close seating |
| 8 ft / 2.44 m | 4.29 ft / 1.31 m | 2.41 ft / 0.73 m | 59.0 in / 150 cm | 10.32 sq ft / 0.96 m² | Typical small media room |
| 10 ft / 3.05 m | 5.36 ft / 1.63 m | 3.01 ft / 0.92 m | 73.8 in / 187 cm | 16.09 sq ft / 1.50 m² | Balanced general-purpose layout |
| 12 ft / 3.66 m | 6.43 ft / 1.96 m | 3.62 ft / 1.10 m | 88.5 in / 225 cm | 23.19 sq ft / 2.15 m² | Large screen with comfortable room depth |
| 14 ft / 4.27 m | 7.50 ft / 2.29 m | 4.22 ft / 1.29 m | 103.3 in / 262 cm | 31.64 sq ft / 2.94 m² | Large-room installation |
| 16 ft / 4.88 m | 8.57 ft / 2.61 m | 4.82 ft / 1.47 m | 118.0 in / 300 cm | 41.28 sq ft / 3.84 m² | Very large screen plan |
| Measurement | How to Measure | Why It Matters | Planning Record |
|---|---|---|---|
| Room length | Measure the clear floor distance from the intended screen wall to the opposite wall. | Determines the maximum possible seating distance and screen scale. | ________ ft / ________ m |
| Room width | Measure the clear wall-to-wall distance at the planned seating row. | Checks side-wall clearance and whether the calculated screen width fits. | ________ ft / ________ m |
| Ceiling height | Measure from the finished floor to the lowest ceiling obstruction. | Helps verify screen height, speaker placement, and sightline clearance. | ________ ft / ________ m |
| Eye height | Measure from the finished floor to the viewer’s seated eye level. | Provides the reference height for vertical screen positioning. | ________ in / ________ cm |
| Primary viewing distance | Measure from the seated eye position to the screen plane, not to the front wall. | Sets the 16:9 screen width and diagonal in the planning table. | ________ ft / ________ m |
| Screen-wall obstructions | Record doors, windows, outlets, vents, radiators, columns, and wall-mounted fixtures. | Prevents conflicts with the screen, equipment, and cable routes. | ________________________________ |
| Seating alignment | Mark the centerline of the primary seat relative to the proposed screen center. | Maintains consistent horizontal viewing geometry for the main viewer. | Centered / Offset: __________ |
Measuring a room for a media center starts with the seating position, not the screen. Measure from the viewer’s eye position to the screen surface, rather than from the back of the sofa. A 36° horizontal viewing field gives a useful balance between immersion and comfort. For a 16:9 screen, its width should be roughly 65% of the viewing distance. For example, a viewing distance of 10 feet suits a screen about 6.5 feet wide. This estimate is practical, but real rooms are rarely perfect.
Mark the intended screen width with painter’s tape. Sit in the primary seat and check whether you can see the full image without turning your head. Measure side seats too. A screen may feel comfortable in the center but overwhelming from a corner. Leave space for speakers, equipment ventilation, doors, and walking paths. I have found that people often measure the wall carefully but forget the sofa depth. That mistake can shift the viewing distance by several inches.
Tips: Use a tape measure twice. Record eye height and seat depth. Check the 36° field from every main seat. If the room feels tight, reduce the screen slightly before moving furniture. Light reflections can also change perceived comfort, so test the space during daytime and evening. Recheck your plan after placing a temporary chair; paper measurements can hide practical problems.
The best way to measure a room for a 5.1 media center is to begin at the main listening position. Mark the center of the sofa, not its front edge. This point becomes the reference for every speaker angle. Measure the room’s length and width, then note doors, windows, cabinets, and reflective walls. Small details matter.
Place the front left and right speakers 22° to 30° from the center line. Keep them at equal distances from the listening position. A simple tape measure works well. Measure from the marked seat to each speaker, and adjust until both distances match. Keep the center speaker close to the screen and aimed toward ear level. Do not trust visual symmetry alone.
The surround speakers should sit 110° to 120° from the listener’s forward-facing line. They belong slightly behind the seating position, with similar side-to-side spacing. Mount them near ear height or a little higher, then angle them toward the listening area. Avoid corners when possible. Bass can become uneven there.
Use painter’s tape to plot every position before drilling. Walk around the room and check whether furniture blocks sound. My own measurements often need a second pass because sofas shift the true listening point. That is easy to overlook. If the room is narrow or irregular, exact angles may be impossible. Choose balanced sound over perfect geometry.
Measure each speaker’s horizontal angle from the main listening position: 0° is directly in front, negative values indicate the left side, and positive values indicate the right side.
For a Dolby 5.1 layout, place the front left and right speakers approximately 22°–30° from the center line. Position the surround left and right speakers approximately 110°–120° from the listening position, with the center speaker aligned at 0°.
Before ordering a media center, measure the room as a viewing system, not an empty rectangle. Record wall width, ceiling height, seating distance, windows, doors, and floor outlets. Use painter’s tape to mark the proposed screen and cabinet footprint. Then sit in the main viewing position. Check whether eye level meets the screen comfortably. A simple cardboard outline can expose awkward sightlines before furniture arrives.
Test several seats, including the side chair. A centered view may look fine from one position but fail near the room’s edge. Keep speakers, shelves, and decorative objects from blocking the screen or creating reflections. I often make this mistake: I measure the front wall carefully, then forget how a reclined viewer sees the lower screen edge. The room always teaches something.
A 19-inch rack requires more space than its front width. Measure equipment depth, rear connectors, ventilation gaps, and access for future servicing. Leave room for failure. Allow enough clearance to remove a component without moving the entire cabinet. Follow each device’s ventilation guidance, especially above heat-producing equipment.
Plan cable routes before fixing shelves. Power cables and signal cables should have separate paths where practical. Avoid sharp bends, tight loops, and hidden connectors pressed against the rear panel. Mark each cable’s destination with a durable label.
Leave a modest service loop, but not a tangled bundle. My final measurement is rarely perfect, so I recheck every clearance with doors open, seats occupied, and cables connected.
: Start at the center of the main listening seat, not the sofa’s front edge. Mark this point with painter’s tape. It becomes your angle reference.
Place them 22° to 30° from the listener’s center line. Keep both speakers equally distant from the marked listening point. Use a tape measure instead of trusting visual symmetry.
Keep it close to the screen and aim it toward ear level. Check that the screen does not block it. Small height differences can affect dialogue clarity.
Place them 110° to 120° from the forward-facing listening line. They should sit slightly behind the seating position. Keep them near ear height or slightly higher.
Mark each proposed position with painter’s tape. Walk around the room and sit in different seats. Furniture may block sound. Corners can also create uneven bass.
Record wall width, ceiling height, seating distance, doors, windows, and floor outlets. Mark the screen and cabinet footprint on the wall or floor. A cardboard screen outline can reveal awkward viewing angles.
Measure the equipment depth, rear connectors, ventilation gaps, and service access. The front width alone is not enough. Leave room to remove components without moving the entire cabinet.
Route cables before installing shelves or fixing the cabinet. Keep power and signal cables separate when practical. Avoid sharp bends and tight loops. Label every cable clearly and leave a small service loop.
Do not measure only an empty room. Test with seats occupied, doors open, cables connected, and furniture in place. My first measurement is often imperfect. Recheck everything before drilling.
How to measure a room for a new media center? Start by measuring the usable room envelope, including wall-to-wall length, width, ceiling height, doors, windows, trim, and fixed obstacles. Record every dimension to the nearest 1/8 inch, then create a simple scaled floor plan. Use the available width and seating layout to plan a 16:9 screen, keeping the main viewing angle near 30 degrees for comfortable image coverage. Check that the seating distance also provides a horizontal viewing field of approximately 36 degrees without forcing viewers too close or too far away.
Next, plot the surround speakers around the primary seating area, placing the front channels roughly 22–30 degrees from the centerline and the rear or side channels around 110–120 degrees. Scale-test the plan with furniture, sightlines, and a standard 19-inch equipment rack. Leave enough space for ventilation, door operation, service access, power connections, and cable bends. A careful drawing and full-size clearance checks can prevent installation conflicts and create a balanced, comfortable media center.

ADC Furniture